What's New
Blackbaud Grantmaking releases new features for customers as part of waved roll outs. Keep an eye on this space for details about the latest additions. If you do not see any updates, don't worry! You may receive these updates immediately or in a future release.
November 4, 2024
 Customize accepted file types and sizes for File upload fields
When configuring File upload fields, you can now specify which file types and sizes will be accepted. In Configuration, select the file types to allow as well as the file size if it differs from the default of 29 MB. You can expand each file type to select specific types like .csv and .pdf.
Note: All file types are accepted by default. If the field is updated to only allow specific types, these will be shown directly below the field in the form. Users will also be notified via error message if they try to upload a type that isn’t supported.
October 3, 2024
Set the due date for workflow level forms to a specific calendar date
When adding additional forms to workflow levels in your programs, you can now set the form’s due date to a specific calendar date. In the Due Date tab, a new Custom due date option allows you to set a custom date for the form to be due.
Note: If a form is sent after the specified date passes, a due date will not be applied to the form.
September 30, 2024
Batch delete Organization records
Users now have the ability to batch delete Organization records from Workspace.
Go to Workspace, and select Organizations. Click the checkbox on multiple Organizations and this will activate the Delete button on the option menu at the bottom of the screen. When you select Delete it will prompt a confirmation for deletion and provide a checkbox option to delete related personal information from the audit history.
Note: You cannot delete an organization if it is associated with a User record.
September 9, 2024
View program guidelines
You can now view more information about your programs and applications by selecting View Guidelines. This can be accessed when starting an application, from My Applications, and when viewing application forms.
Note: This may not be available for all programs. The View Guidelines link will only be shown if the organizer has set the program up to include this information. For more information, see View Program Guidelines.
Guidelines can be added to programs, allowing applicants to view this information in the Applicant Portal
You can now add program guidelines to your grant programs, allowing applicants to easily view information about eligibility, the application process, and more. When editing your program, add this information to the Program guidelines field in Details. Content can be formatted to include headers, bulleted lists, and links.
If added to your program, applicants can select the View Guidelines link when they start an application, in their application card in My Applications, and when viewing their program forms to open the information in a new modal.
Note: Guidelines can be translated alongside the rest of the program details. For more information, see Translate Grant Program Details.
Tip: If your guidelines are hosted on an external webpage or online document, it’s recommended to use this feature to add a link back to this resource.
August 26, 2024
New setting allows you to specify the countries and/or regions eligible for a program
A new program setting allows you to define the location of organizations that are eligible to apply. When editing a program, click on Manage Locations in the Settings tab to specify each country and region. Only organizations in these locations appear in the organization search when completing an application, as shown below. Additionally, applicants will only be able to add new organizations if they're in the specified locations.
Note: All locations are supported by default. For more information, see Grant Program Settings.
Warning: This setting is not available if the program uses charity buckets or individual applicants.
August 14, 2024
Canceled applications are automatically hidden in the Applicant Portal
To help applicants more easily find relevant applications, we’ve updated the search and filter options in the Applicant Portal.
These updates include:
-
Search for the organization name associated with an application
-
Canceled applications are now automatically hidden from view
Note: To view these applications, click on the Status dropdown menu and select the checkbox next to the Canceled status.
All program email templates sent to applicants now show the client's name or Sender display name as the email signature
All program email templates now show the client's name by default as the email signature. To provide a custom signature instead of creating a new email copy, edit the program and update the Sender display name field in the Settings tab.
Note: This update only applies to emails related to programs. This does not impact those sent to Grant Managers. You can view these emails by going to the Communications tab when editing the program.
Note: Only email templates have been updated. If you’ve made a custom email copy, the signature in the copy will remain the same.
Email templates related to vetting can be turned off
Grant Managers can now turn off email templates related to vetting if you do not want them to be sent to applicants or Grant Managers. To do so, navigate to Applications > Form emails to access the System Emails area and select Deactivate this email for the following emails:
-
GC-42 Vetting Declined (Applicant)
-
GC-43 Vetting Declined (Grant Manager)
-
GC-44 Vetting Approved (Applicant)
-
GC-45 Vetting Approved (Grant Manager)
-
GC-91 Vetting Request Canceled (Grant Manager)
Tip: To turn off emails only for specific programs, select Deactivate this email for these emails in the Communications tab when editing the program instead.
Note: If enabled, these emails will not be sent if the program cycle has been updated to use a client-processor for ineligible organizations since vetting is no longer relevant. They will also not be sent if the application related to the request has been Approved and Awarded OR Canceled, Declined, or Archived.
Table field column settings for Enabled, Required, and Label can be configured at the component-level, allowing you to further customize Table fields across forms
When configuring Table fields in the Form Builder, you now have more control over the field/column settings at a component level. In the Columns tab of the Configuration modal, you’ll now see the following options:
-
Edit the label for each column
-
Specify which fields to make available in the table when completing the form by selecting the Enabled checkbox
-
Require applicants to complete a field by selecting the Required checkbox
Note: Any fields that are set to Required at the field-level will always be required at the component-level. If the Table field is being used in multiple forms where its fields may not always be required to complete, it’s recommended to leave the Required setting unchecked at the field-level and instead select Required in the component instead.
Note: The Configuration modal now displays as full page, allowing you to better see Table fields and their respective columns in the Preview window. For Table fields with many columns, you may find it helpful to filter the view in the Columns tab by All available columns, Visible columns, or Hidden columns.
Note: The character limitations for the Signature description text box that appears when the Require signature when submitting form setting is enabled have been removed to better accommodate rich text formatting. Previously, this text was limited to 1,000 characters.
Instructions in the applicant-facing Vetting Required modal have been updated for clarity and to provide additional vetting resources
We’ve updated the instructions and resources applicants see in the Vetting Required modal, providing clarity around how the contact information they submit will be used and linking out to Help Center articles that explain why their organization needs to be vetted.
Note: These instructions appear if applicants or Grant Managers select an unvetted organization from the search when completing an application and when adding a new organization. For more information, see the Blackbaud Giving Fund (BBGF) Global Vetting resources for Grant Managers or the Why is vetting required for my organization? FAQ for applicants.
July 29, 2024
Canceled applications are automatically hidden in the Applicant Portal
To help applicants more easily find relevant applications, we’ve updated the search and filter options in the My Applications area of the Applicant Portal. These updates include:
-
Search for the organization name associated with an application
-
Canceled applications are now automatically hidden from view
Note: To view these applications, click on the Status dropdown menu and select the checkbox next to the Canceled status.
All program email templates sent to applicants now show the client's name or Sender display name as the email signature
All program email templates now show the client's name by default as the email signature. To provide a custom signature instead of creating a new email copy, edit the program and update the Sender display name field in the Settings tab.
Note: This update only applies to emails related to programs. You can view these emails by going to the Communications tab when editing the program. System emails will still show Blackbaud Grantmaking Support as the signature.
Note: Only email templates have been updated. If you’ve made a custom email copy, the signature in the copy will remain the same.
Table field column settings for Enabled, Required, and Label can be configured at the component-level, allowing you to further customize Table fields across forms
When configuring Table fields in the Form Builder, you now have more control over the field/column settings at a component level. In the Columns tab of the Configuration modal, you’ll now see the following options:
-
Edit the label for each column
-
Specify which fields to make available in the table when completing the form by selecting the Enabled checkbox
-
Require applicants to complete a field by selecting the Required checkbox
Note: Any fields that are set to Required at the field-level will always be required at the component-level. If the Table field is being used in multiple forms where its fields may not always be required to complete, it’s recommended to leave the Required setting unchecked at the field-level and instead select Required in the component instead.
Note: The Configuration modal now displays as full page, allowing you to better see Table fields and their respective columns in the Preview window. For Table fields with many columns, you may find it helpful to filter the view in the Columns tab by All available columns, Visible columns, or Hidden columns. For more information, see Create New Table Fields.
Other
The character limitations for the Signature description text box that appears when the Require signature when submitting form setting is enabled have been removed to better accommodate rich text formatting. Previously, this text was limited to 1,000 characters.
July 26, 2024
Rich Text Editor
Rich text editing has been added to generated emails allowing for additional email personalization before sending. The formatting options for sending emails include the ability to Bold, Italic, Underline, Strikethrough, and Clear formatting. These features will be available under the Format dropdown and via buttons above the email Body text box. Additionally, users will have access to an Edit dropdown that will allow Undo, Redo, Cut, Copy, Paste, and Select all functions.
Note: If there are multiple recipients that appear in the left column, the user will need to perform the changes for each individual recipient.
July 15, 2024
New option to define the default font format used for custom rich text content
You can now customize your default font styling used for custom rich text content in the Portal Settings > Rich Text area. The formatting set will be applied when using the rich text editor for the following components:
-
Custom emails
-
Document templates
-
Content component in custom forms
-
Text area fields in custom forms
-
Program description
-
Master eligibility responses (e.g., success, failed) for Eligibility Forms
-
Email comments that support rich text
Note: This formatting only applies to components that support rich text. For more information, see Manage Your Client Account.
Payment status is hidden in the Applicant Portal by default for new grant programs
When creating a new grant program, the Hide payment status in Applicant Portal setting in the Payment Status section of the Settings tab is now enabled by default. When enabled, applicants can still view their payment details but are not shown the status of the payment.
Note: This is only enabled automatically for new programs. Existing grant programs are not impacted. For more information, see Configure Grant Program Settings.
Tip: This update may be beneficial to clients who process payments themselves as the status often shows Pending unless updated manually in Blackbaud Grantmaking.
New program setting allows you to disable the ability for applicants to copy applications
A new program setting allows you to disable the ability for applicants to copy an application. To disable this functionality, edit your program and deselect the new Allow applicants to copy applications in the Ability to Copy section of the Settings tab.
Note: For more information, see Configure Grant Program Settings.
Minor user interface updates to the Manage Applicants modal
When adding and managing applicants for an application, you’ll notice that we’ve made several updates to the Manage Applicants modal to provide more clarity and better align the interface with current standards. This includes replacing the Permissions icons with text and requiring you to click on Remove to confirm deleting an applicant rather than choosing Yes or No.
Note: For more information, see Add and Manage Applicants (Applicant Portal resources).
May 2, 2024
File types and PDF's not included in WOPI
Users now have the ability to view Documents that are not accessible by Microsoft Office in a new tab. A new button has been added to the Document record called 'Open file' that allows viewing of PDFs and images. Users can also download the file using the hyperlink on the Record.
April 30, 2024
Microsoft Word Open File
Users now have the ability to search by a Request or by Document. When users search for a Request, and select the ellipsis on the specified row for the content menu, they can choose 'Open in Office for the web' as an option. This will open the document in a separate tab for viewing.
Note: If the user does not have Microsoft Office 365, the document will be viewable only. Additionally, Doc type files will only be viewable.
When users view a record from the content menu, the 'Open in Office for the web' button will appear on the document. Users will still have the ability to replace the file using the Replace file button.
April 11, 2024
Batch delete Request records
Users now have the ability to batch delete Request records from Workspace.
Go to Workspace, and select Requests, then click the checkbox on multiple Requests and this will prompt the Delete button on the option menu at the bottom of the screen. When you select Delete it will prompt a confirmation for deletion and provide a checkbox option to delete related personal information from the audit history.
Note: You cannot delete a request if you have a paid payment on the Request or if you have a payment that has been associated with a budget.
Batch delete Contact records
Users now have the ability to batch delete Contact records from Workspace.
Go to Workspace, and select Contacts, then click the checkbox on multiple Contacts and this will prompt the Delete button on the option menu at the bottom of the screen. When you select Delete it will prompt a confirmation for deletion and provide a checkbox option to delete related personal information from the audit history.
Note: You cannot delete a contact if it is associated with a User record.
We added a column to Contacts called Last Request Create Date that will allow users to see the last request date created for each contact.
April 1, 2024
Cancel application
Applicants now have the option to cancel their application on new forms on the Applicant Portal.
Note: This is only active on the new Grantee Portal.
When applicants submit an application, they can go into Manage for their application on the Applicant Portal and decide if they want to cancel the application. Once an applicant cancels, it will automatically update the request record with a 'Withdrawn by applicant on Date' message.
Note: The applicant can do this at any time during the application process.
New column for Last Request Create Date
Users can now access a new column called 'Last Request Create Date' in the Contact view that will show the most recent request create date from Request related records Audit column.
Go into Workspace , select Contacts, click Edit columns, then scroll or search for Last Request Create Date.
Revision requested
Admins are now able to review more information regarding Revision requests under the new Revision requested tab.
Go into Pending Submissions, under the Pending tab, click the ellipsis on a row and select Consider. This will open to a page with the checkbox option to Publish for Revision. When this checkbox is selected the submission will then appear under the Revision requested tab with application information.
March 18, 2024
Declination Reason
Users can now search on Declination Reason using the Full search option to help pull reports about disposition and access more information about declined reports and the reason for why it was declined.
Go into Workspace , select Full search, click Add Filters, then scroll or search for Declination Reason.
Note: It can also be saved as a column.
February 20, 2024
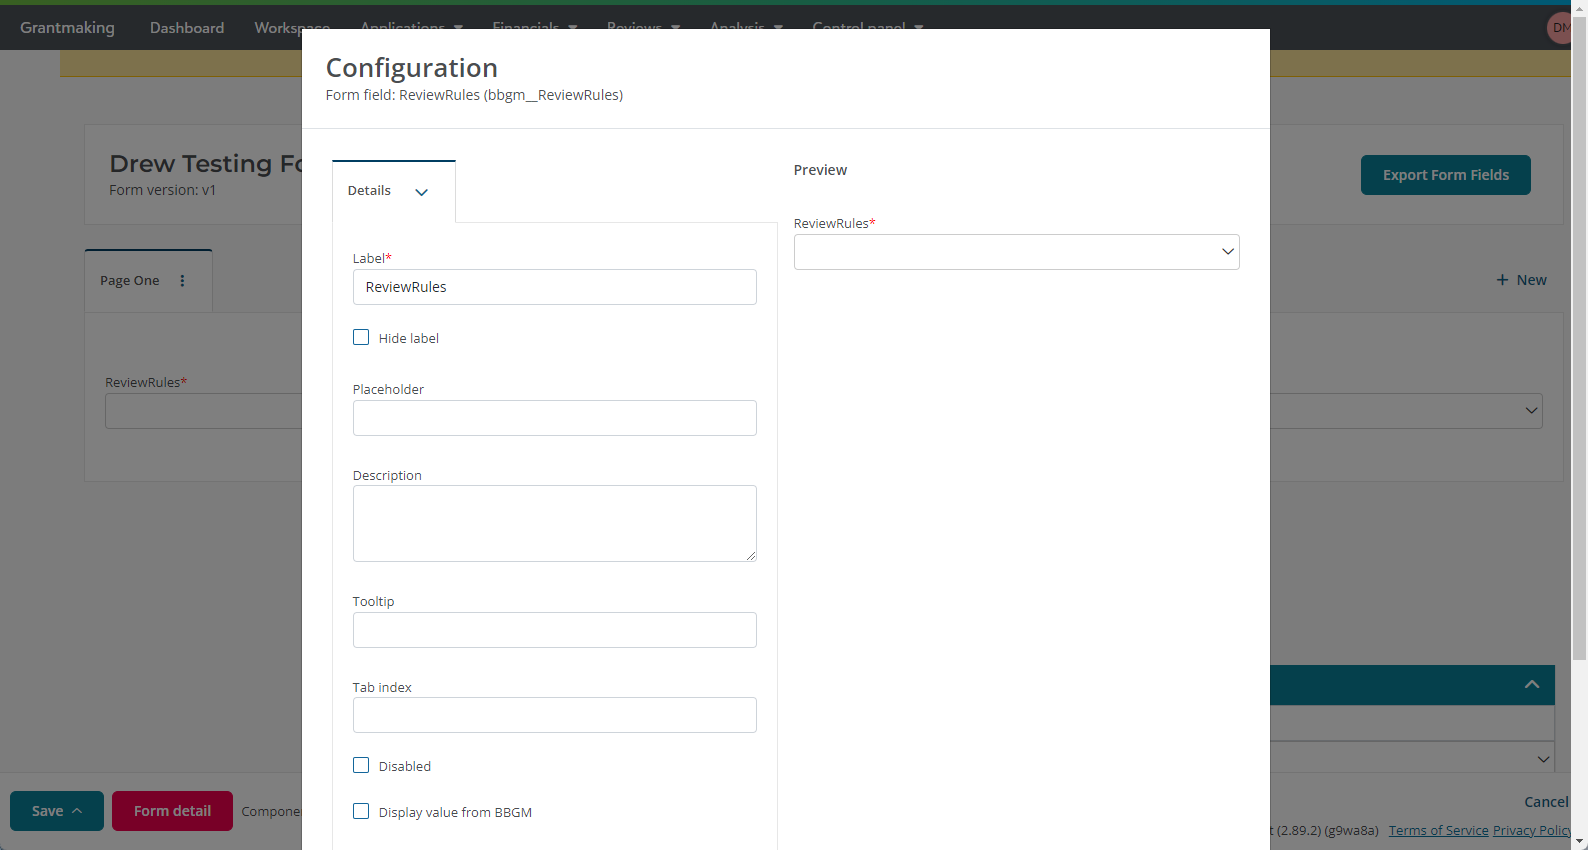
Review Rules
There has been a change for creating Review Rules (for some of you)
You can create Review rules to automatically assign reviews for applications that come in.
Note: They must be assigned to application forms.
1. From Application, select Manage forms, then click into a form to access the Form Builder toolbox and locate the ReviewRules form field.
2. Select the rules to apply to the application form, then Save and Close.
Tip: To make it hidden, select Edit, then uncheck 'Clear value when hidden' and select 'Always hide component' in the dropdown. This will allow it to be active on the form, but the applicant will not be able to view it.
Same as Organization Primary Contact
Users can add Same as Organization Primary Contact on new forms via the Form Builder toolbox (for some of you)
1. From Application, select Manage forms, then click into a form to access the Form Builder and locate the Same as Organization Primary Contact form field. It is just a checkbox. It does not have logic connected to the tables by itself and will not automatically hide the request.
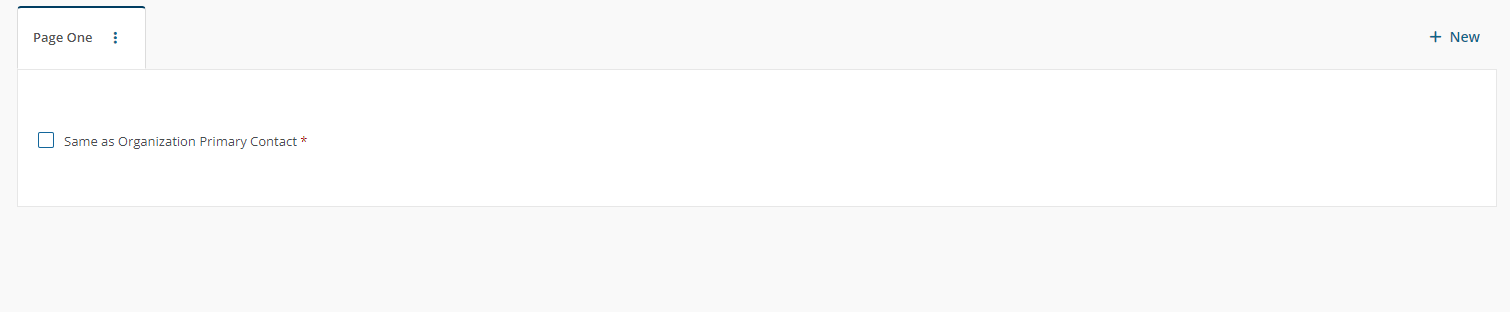
Note: If Organization contact is the same as the request, when checked by the applicant, the contact in the Request Contact Table marked "is Primary", will be used as the Organization Primary Contact. If the organization only wants one request contact, you must add advanced conditional logic. The checkbox won't have advanced logic to hide that.